From previous research that has been completed, having a more in-depth knowledge and understanding of the ukulele and it's properties is essential for this next process to be completed. It will allow construction to be organised and flow smoothly.
Concept designs
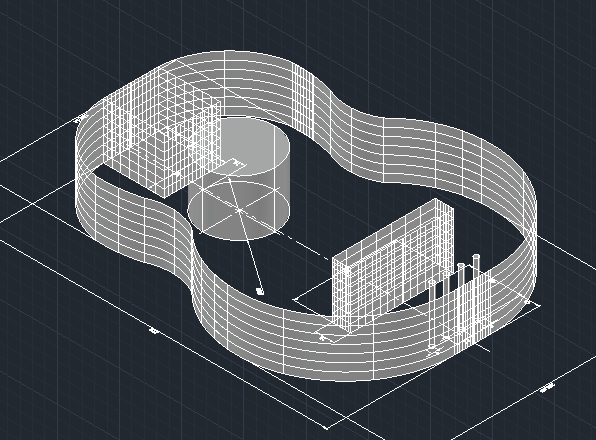
Figure 17: CAD

Figure 18: CAD

Figure 19: CAD
ELEMENTS of the body's SOLUTION GENERATION
Solution 1:
Steam bending was used to create the curved side panels of the body. This was decided upon after researching which bending process was most effective in producing a high quality result. A rice cooker would be used as the steamer.
Another reason behind this choice was because the chosen material was laminated Walnut veneer which had been set with an adhesive between layers. By using the rice cooker as a steamer, it closely represented the steam box method, which allowed for the adhesive to not become detached or weakened.
The following video was extremely informative and was used as a guide for the steam bending process. ( View it now):
(Wandel, 2013)
The following images show how the video helped and supported a positive outcome. Notice how there is a large amount of overhang, this was done deliberately to reduce the possibility of making two differing sized parts. Instead, this overhang allowed for both parts, once the bending process was completed, to be cut exactly to the same size.

Image 84: (Turner, 2016)

Image 85: (Turner, 2016)
Solution 2:
For the top and bottom panels, the material was thickness-ed down to 4mm. The Tasmanian Oak and veneered Rosewood were then glued together in the middle via the use of PVA glue.
Once all glued together, for the soundboard, which is the top panel, the sound hole was drilled and the attachment of the internal thin pine rods were placed inside. By attaching the thin pine rods, it caused two things to occur. One being, the ukulele's acoustics were made. This happens from the sound waves rebounding and reflecting off the internal surfaces. And secondly, by attaching the pine rods it reinforced the strength of the thin timber, causing less chance of cracks or breakages.

Image 86: (Turner, 2016)
If you notice in the image, there are small pieces of timber which curves around the outside of the bent walnut. These small pieces are feathered to help create the curve, also know as ribbing. By ribbing the ukulele's internal body, it allowed for increased overall strength as well as a stronger bond between top and bottom panels of the curved Walnut piece.
Solution 3:
Where the body and neck meet, is to be a joint which holds it all together. Originally within that joint, ukuleles and guitars have two main screw outlets which anchor the neck to the body, and visa versa. But after acknowledging a dislike of screw wear within timber products, another joint was needed. Originally when researching different concepts, the idea of having a seamless dowel joint was preferred. For this reason, after acquiring the information before proceeding as a possibility, a dowel joint was decided upon and used.
Where the body and neck meet, is to be a joint which holds it all together. Originally within that joint, ukuleles and guitars have two main screw outlets which anchor the neck to the body, and visa versa. But after acknowledging a dislike of screw wear within timber products, another joint was needed. Originally when researching different concepts, the idea of having a seamless dowel joint was preferred. For this reason, after acquiring the information before proceeding as a possibility, a dowel joint was decided upon and used.
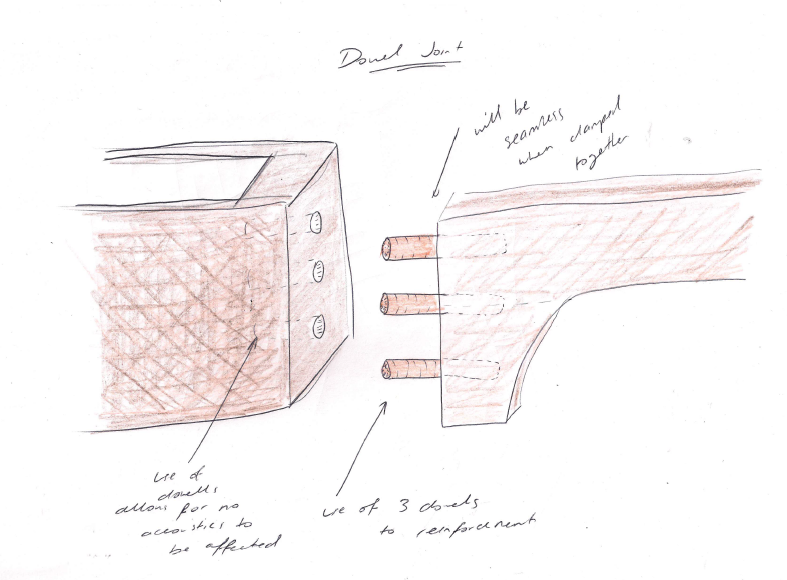
Figure 20: Freehand Sktech
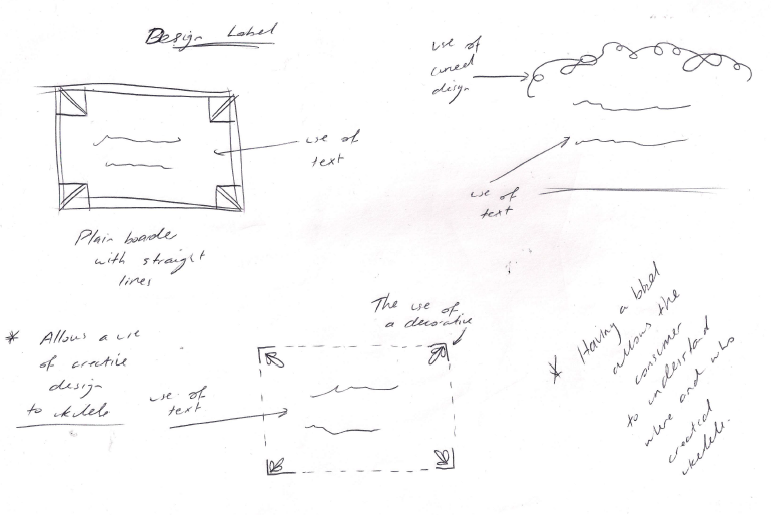
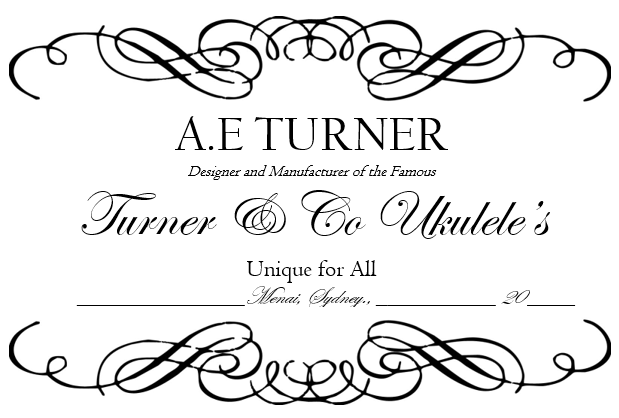
Label Design
To make more authentic, decided to design and print an original label for the unique ukulele. This was the end product:
Body Operation sheet
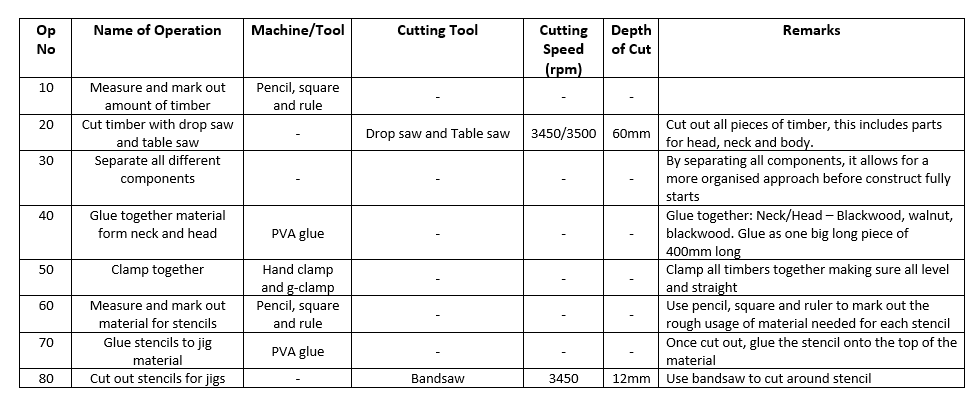
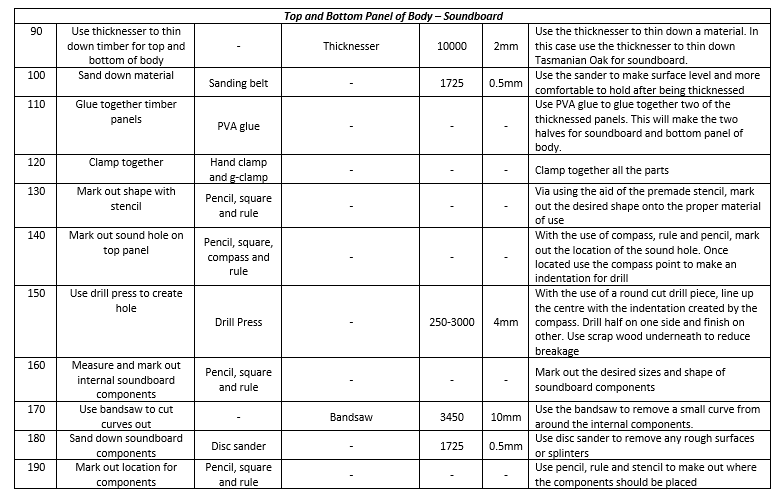

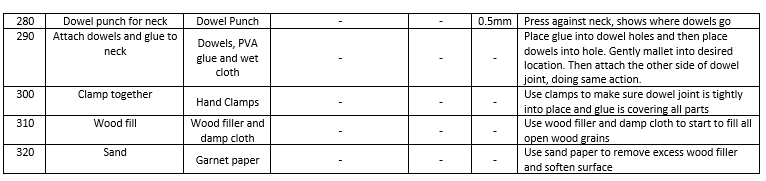
Figure 21: Body Operation Sheet
Extras
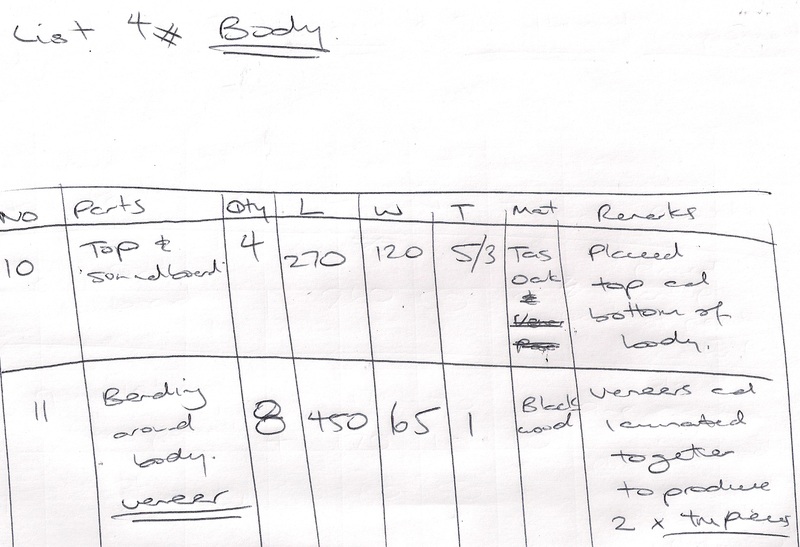

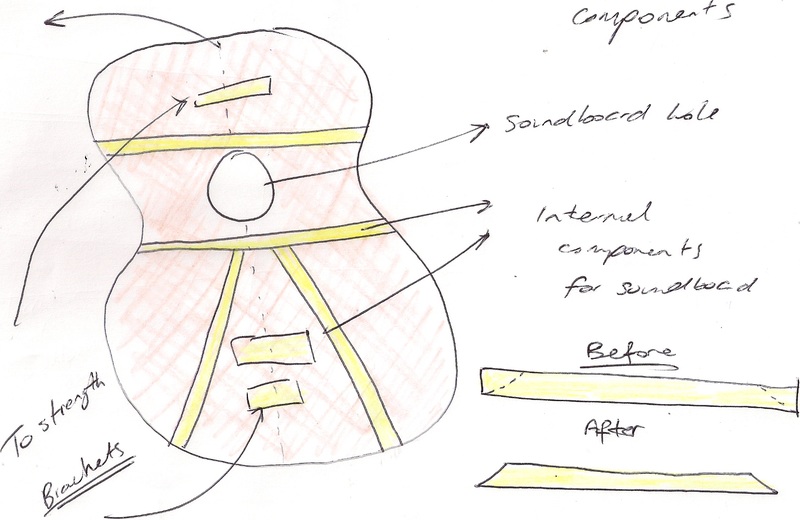
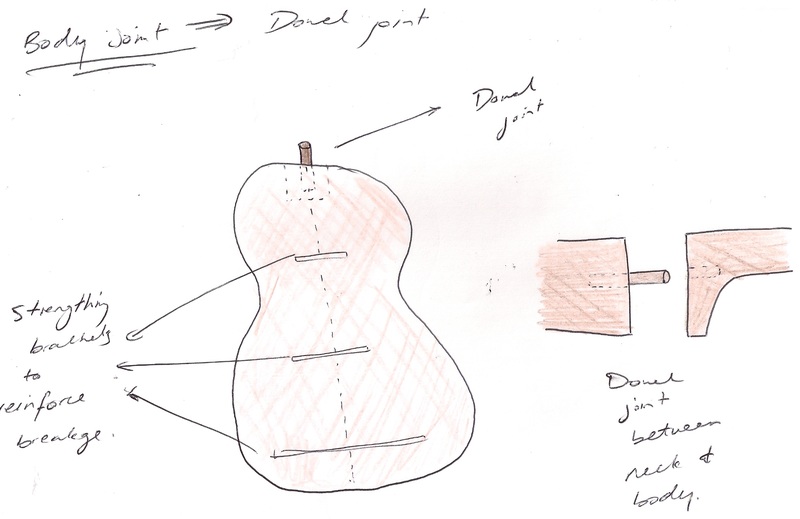
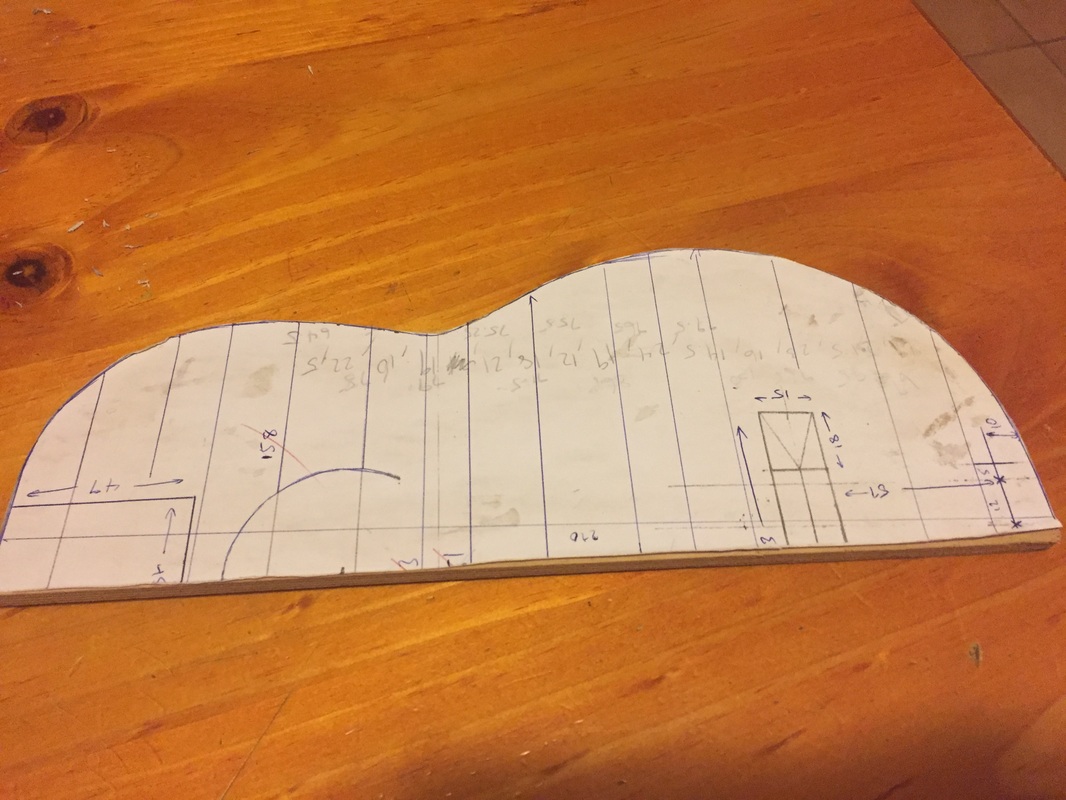
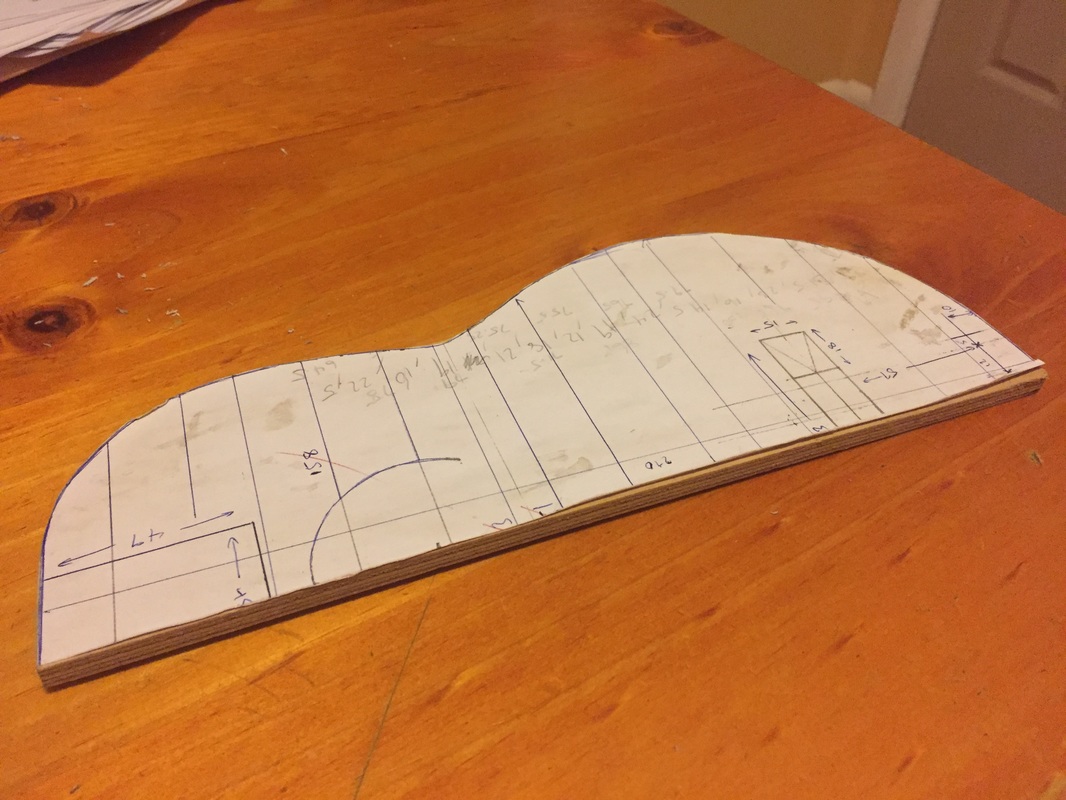
Image: Stencils used in construction as well as label design and end label
Watch more below for the last stage to this project
